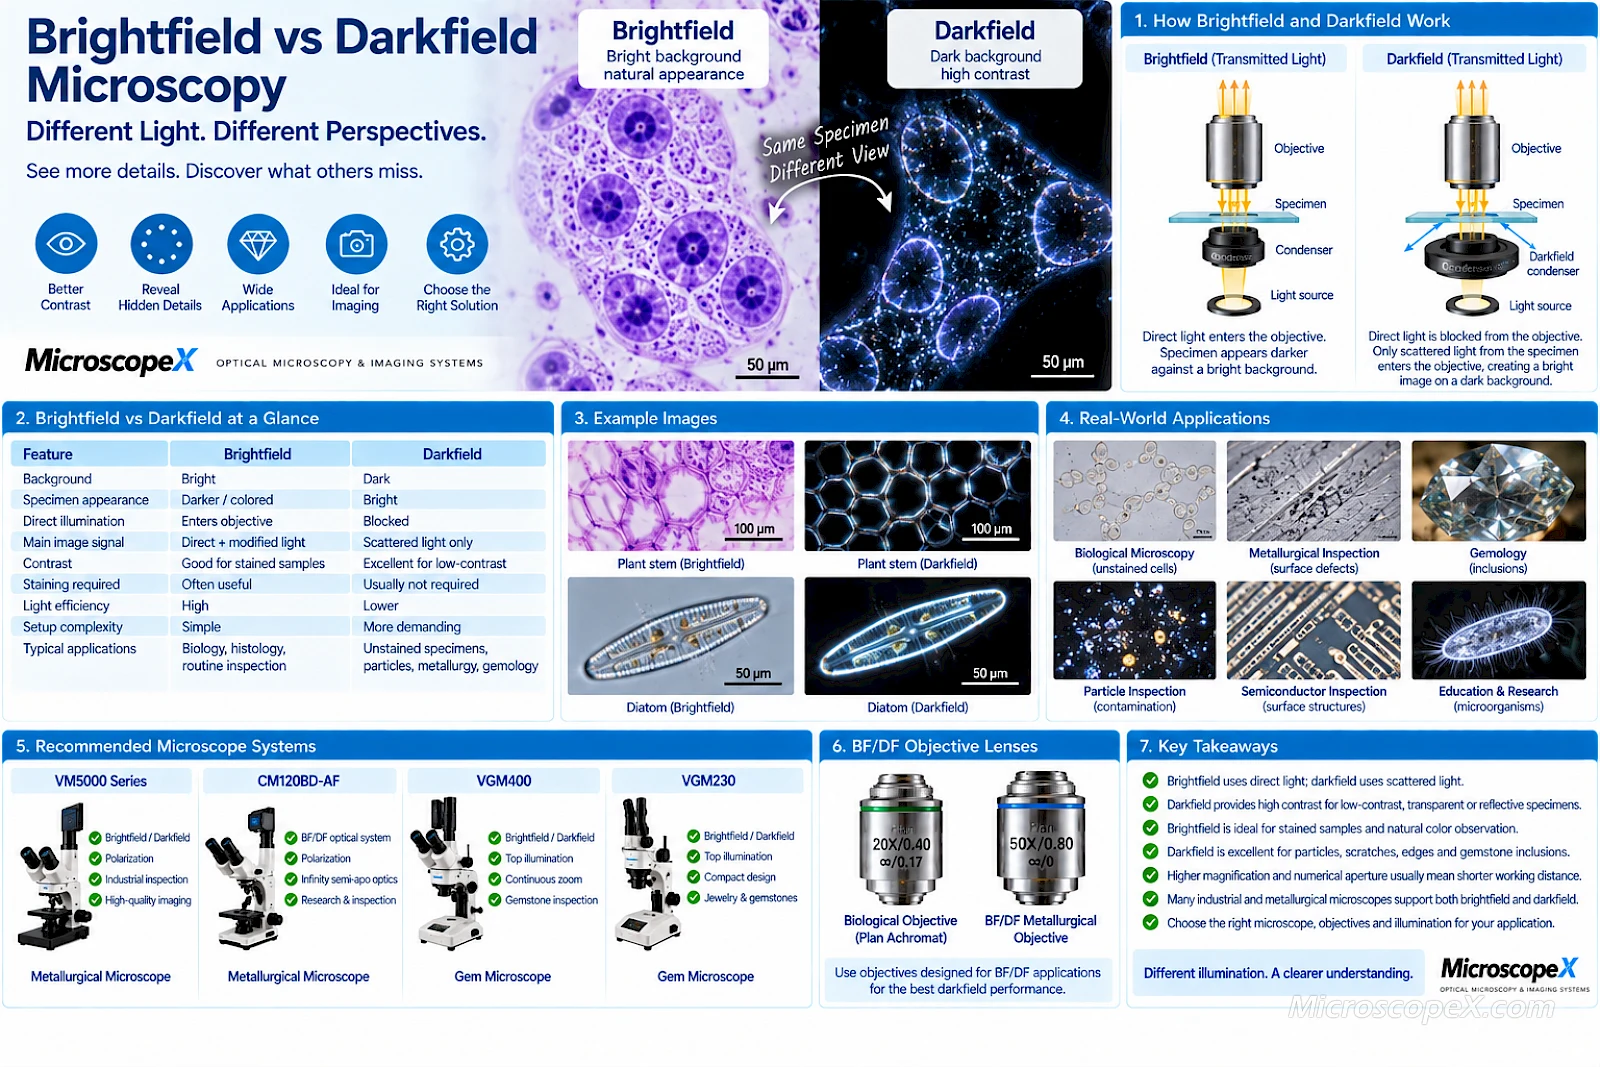
Brightfield and darkfield are two of the most fundamental illumination techniques in optical microscopy.
They can be used to observe the same specimen in dramatically different ways.
In brightfield microscopy, the background is bright and specimen structures appear darker, colored or more absorbing against it.
In darkfield microscopy, direct illumination is excluded from the objective so that only light scattered, reflected, refracted or diffracted by the specimen contributes strongly to the image.
The result is essentially reversed:
Bright specimen features on a dark background.
Neither method is universally better.
Brightfield is simple, efficient and ideal for many stained, naturally contrasted or reflective specimens.
Darkfield is extremely useful when the specimen has very little contrast in conventional brightfield or when small edges, particles, scratches and surface irregularities need to stand out clearly.
The best technique therefore depends on:
- Specimen type
- Transparency
- Surface structure
- Contrast
- Illumination geometry
- Objective numerical aperture
- Required information
This guide explains how brightfield and darkfield microscopy work, their advantages and limitations, and how to choose between them for biological, metallurgical, gemological and industrial microscopy.
For a broader introduction to microscope illumination and optics, see Optical Microscope Basics.
Brightfield vs Darkfield at a Glance
| Feature | Brightfield | Darkfield |
|---|---|---|
| Background | Bright | Dark |
| Specimen appearance | Darker / colored against bright field | Bright against dark field |
| Direct illumination enters objective | Yes | Mostly excluded |
| Main image signal | Direct + specimen-modified light | Scattered / reflected / refracted light |
| Setup complexity | Simple | More demanding |
| Light efficiency | High | Lower |
| Staining | Often useful for transparent specimens | Often unnecessary |
| Transparent low-contrast specimens | Can be difficult | Excellent |
| Surface scratches / particles | Good | Often excellent |
| Internal stained structures | Excellent | Less natural |
| Quantitative morphology | Usually more straightforward | Image can emphasize edges/scattering |
| Typical applications | Biology, histology, routine inspection | Unstained specimens, particles, metallurgy, gemology |
The fundamental difference is how illumination reaches the objective.
What Is Brightfield Microscopy?
Brightfield microscopy is the most familiar form of optical microscopy.
The specimen is illuminated so that direct light enters the microscope objective.
The background therefore appears bright.
Features in the specimen modify the light through:
- Absorption
- Reflection
- Scattering
- Diffraction
- Color
- Refractive-index differences
These variations create contrast.
In transmitted biological brightfield microscopy, a simplified optical path is:
Light Source
↓
Condenser
↓
Specimen
↓
Objective
↓
Eyepiece / Camera
Most of the direct illumination passes through the specimen and enters the objective.
Structures that absorb or redirect light appear darker or colored against the bright background.
What Does a Brightfield Image Look Like?
A typical brightfield image has:
Bright background
with:
Darker or colored specimen features
For example, a stained tissue section may show:
- Purple nuclei
- Pink cytoplasm
- Differently colored tissue structures
against a relatively bright background.
Brightfield images tend to look familiar and visually intuitive because the brightness distribution resembles ordinary transmitted-light viewing.
Why Brightfield Is So Common
Brightfield microscopy is popular because it is:
- Simple
- Reliable
- Bright
- Cost-effective
- Easy to align
- Compatible with many objectives
- Suitable for cameras
It is the standard starting point for many:
- Biological microscopes
- Educational microscopes
- Histology systems
- Metallurgical microscopes
For many specimens, no more specialized contrast technique is necessary.
What Is Darkfield Microscopy?
Darkfield microscopy changes the illumination geometry.
Instead of allowing direct axial illumination to enter the objective, the central direct light is blocked or redirected.
The specimen is illuminated at high or oblique angles.
If there is no specimen present, this light normally misses the objective.
The field therefore appears dark.
When the specimen is introduced, structures in it can:
- Scatter light
- Diffract light
- Refract light
- Reflect light
Some of that redirected light enters the objective.
Those structures then appear bright against the dark background.
The Basic Darkfield Principle
A simplified transmitted darkfield optical path is:
Light Source
↓
Darkfield Stop / Condenser
↙ ↓ ↘
Oblique Illumination
↓
Specimen
↗ Scattered Light ↖
Objective
Direct light:
misses the objective
Scattered specimen light:
enters the objective
The result is:
Bright specimen + black background
Why Does the Background Become Black?
In correctly adjusted darkfield illumination, the direct illuminating rays are angled so that they do not enter the objective.
With no specimen present, essentially no direct illumination reaches the image plane.
Therefore the field appears dark.
Once a specimen is introduced, optical discontinuities redirect some light into the objective.
Examples include:
- Cell boundaries
- Particles
- Fibers
- Scratches
- Grain boundaries
- Surface defects
These structures appear luminous against the dark background.
Brightfield Uses Direct Light — Darkfield Uses Scattered Light
This is the most useful conceptual distinction.
Brightfield
The objective receives:
Direct illumination + specimen-modified illumination
Darkfield
The objective mainly receives:
Light redirected by the specimen
This difference creates dramatically different contrast.
Brightfield vs Darkfield Image Appearance
Imagine a transparent fiber.
Brightfield
The field is bright.
The fiber may appear:
- Slightly darker
- Low contrast
- Difficult to distinguish
Darkfield
The field is black.
Light scattered by the fiber makes it appear:
- Bright
- High contrast
- Clearly outlined
The specimen has not necessarily gained more fundamental optical resolution.
Its visibility and contrast have changed.
This distinction is important.
Does Darkfield Increase Microscope Resolution?
Not automatically.
Darkfield can make very small or weakly contrasted structures dramatically easier to detect because scattered light is displayed against a black background.
But that does not mean the objective's fundamental diffraction-limited resolving power has suddenly increased.
Darkfield mainly changes:
Contrast and visibility
rather than simply increasing:
Objective resolution
A feature can become much easier to detect without necessarily being resolved into its complete geometrical structure.
Visibility vs Resolution
These two concepts should not be confused.
Detection
Can you tell that something is present?
Resolution
Can you distinguish its shape or separate two nearby structures?
A very small particle can scatter enough light to become visible as a bright point in darkfield even when the microscope cannot fully resolve its physical dimensions.
This is one reason darkfield is useful for fine particles and contamination.
Brightfield and Specimen Contrast
Brightfield works especially well when the specimen already produces substantial optical contrast.
This may come from:
- Natural pigment
- Staining
- Strong absorption
- Reflectivity
- Surface relief
- Material boundaries
For transparent biological specimens with very little absorption, brightfield contrast may be weak.
This is why biological specimens are frequently stained.
Why Biological Samples Are Often Stained
Many cells are mostly transparent.
Their refractive index differs only slightly from their surroundings.
Without contrast enhancement, a cell under brightfield may appear nearly invisible.
Stains can selectively color structures such as:
- Nuclei
- Cytoplasm
- Connective tissue
- Bacteria
- Cell walls
This increases absorption differences and makes structures easier to identify.
Does Brightfield Always Require Staining?
No.
Brightfield can also observe unstained specimens.
Examples include:
- Naturally pigmented samples
- Thick specimens
- Strongly absorbing particles
- Materials with sufficient refractive contrast
Staining is simply one of the most common ways to improve brightfield contrast in biological microscopy.
Darkfield Often Works Without Staining
Darkfield does not depend primarily on absorption.
Instead, it highlights structures that redirect illumination.
This makes it useful for:
- Transparent specimens
- Thin fibers
- Small particles
- Unstained microorganisms
- Edges and boundaries
A specimen that is nearly invisible in brightfield can become striking under darkfield illumination.
Transmitted Darkfield Microscopy
Transmitted darkfield is most commonly associated with biological and transparent specimens.
The light source is below the specimen.
The condenser creates an oblique hollow cone of illumination.
The objective is positioned above the specimen.
The system is arranged so that direct rays do not enter the objective.
Only specimen-scattered light reaches it.
Darkfield Condenser
A darkfield condenser is designed to produce the required oblique illumination.
Depending on microscope design, this may be achieved with:
- Opaque central stop
- Dedicated darkfield condenser
- Condenser turret
- Paraboloid or cardioid optical system
The correct condenser depends on:
- Objective NA
- Magnification
- Microscope configuration
Low-power darkfield can often be achieved relatively simply.
High-NA darkfield becomes more demanding.
Why Condenser Numerical Aperture Matters
For proper transmitted darkfield, the illuminating cone must pass outside the objective's acceptance angle.
Conceptually:
Condenser illumination NA > Objective collection NA
If the objective captures the direct illumination, the background will no longer remain dark.
This is why darkfield alignment becomes more difficult with high-NA objectives.
High-Power Darkfield
At low magnification, a simple darkfield stop can often work effectively.
At high magnification, specialized darkfield condensers may be required.
This is because high-power objectives have larger numerical apertures.
The darkfield condenser must generate an illumination cone with an even larger NA so that direct light still avoids the objective.
Why Some Objectives Have an Iris for Darkfield
Certain high-power darkfield systems use objectives with an adjustable iris diaphragm.
Reducing the effective objective NA helps ensure that:
Direct oblique illumination misses the objective
while:
Scattered specimen light can enter
This can make high-power darkfield easier to achieve.
Reflected-Light Darkfield Microscopy
Darkfield is not limited to transparent biological specimens.
It is also extremely useful for opaque industrial specimens.
This is called:
Reflected darkfield
or:
Epi-darkfield
Typical applications include:
- Metallurgy
- Semiconductor inspection
- Surface analysis
- Precision components
- Coatings
Here, illumination comes from above rather than through the specimen.
How Reflected Darkfield Works
In reflected darkfield, oblique illumination strikes the specimen surface at angles that keep the regular reflected light out of the objective.
A smooth flat surface therefore appears dark.
Surface irregularities scatter light into the objective.
These features appear bright.
This makes darkfield extremely effective for finding:
- Scratches
- Pits
- Ridges
- Particles
- Grain boundaries
- Surface contamination
Brightfield vs Darkfield for Metal Surfaces
Consider a polished metal surface.
Brightfield
The smooth reflective surface may appear:
- Bright
- Uniform
Defects may be visible, but subtle features can blend into the background.
Darkfield
The smooth background becomes:
Dark
while scratches and irregularities scatter light:
Bright
This can make tiny surface defects stand out dramatically.
Darkfield for Metallurgical Inspection
Darkfield can be especially valuable for:
- Surface quality
- Grain boundaries
- Coatings
- Semiconductor features
- Polished components
MicroscopeX offers several systems with integrated brightfield and darkfield capability.
For example:
VM5000 Series Metallurgical Microscope
supports both brightfield and darkfield observation for precision industrial inspection.
BF and BF/DF Objectives
Industrial objectives may be classified as:
BF
or:
BF/DF
where:
- BF = Brightfield
- DF = Darkfield
A BF/DF objective is designed to support the specialized illumination geometry required for reflected darkfield.
These objectives are not simply standard biological objectives with a different label.
They are part of an optical system designed for both illumination modes.
MicroscopeX BF/DF Objectives
MicroscopeX provides Infinity BF/DF Metallurgical Objectives for compatible reflected-light metallurgical microscope systems.
Available magnifications cover a broad range for industrial inspection.
When configuring a BF/DF microscope, always verify compatibility between:
- Objective
- Illuminator
- Nosepiece
- Microscope optical system
Darkfield vs Brightfield for Surface Scratches
Surface scratches are an ideal example.
A polished surface can create a strong brightfield background.
A shallow scratch may produce only a small intensity difference.
In darkfield:
- Smooth surface → dark
- Scratch → scatters light → bright
The contrast can increase dramatically.
This is why darkfield is widely used in industrial defect inspection.
Darkfield for Semiconductor Inspection
Semiconductor samples can contain:
- Small particles
- Fine scratches
- Pattern defects
- Surface contamination
Darkfield is particularly sensitive to structures that scatter light.
This makes it useful for locating certain surface abnormalities rapidly.
Brightfield can then provide additional structural information.
In advanced inspection systems, the two modes may be used together.
Brightfield and Darkfield Are Complementary
This is a central point.
It is often a mistake to ask:
“Which one is better?”
A better question is:
“What information does each mode reveal?”
Brightfield may reveal:
- Overall structure
- Color
- Absorption
- Surface tone
Darkfield may reveal:
- Edges
- Scattering centers
- Small particles
- Scratches
- Boundaries
The same specimen can therefore benefit from both.
Example: Industrial Workflow
A technician might:
Step 1
Use brightfield to inspect overall surface structure.
Step 2
Switch to darkfield to search for:
- Scratches
- Particles
- Defects
Step 3
Return to brightfield for documentation.
Step 4
Use polarization or DIC if additional information is required.
Multi-mode microscopes make this workflow efficient.
Multi-Mode Metallurgical Microscopes
Modern metallurgical microscopes may combine:
- Brightfield
- Darkfield
- Polarization
- DIC
- Digital imaging
For example, the CM120BD-AF supports brightfield, darkfield and polarization in a scientific industrial inspection platform.
The CM80BD-AF similarly combines BF/DF observation with optional DIC and polarized-light capability.
These systems illustrate why illumination mode should be considered part of the microscope configuration rather than an isolated accessory.
Brightfield vs Darkfield in Gemology
Gemological microscopes use brightfield and darkfield somewhat differently from conventional biological microscopes.
Gemstones contain internal structures such as:
- Inclusions
- Cracks
- Growth features
- Bubbles
- Internal boundaries
Darkfield illumination can make these features highly visible.
Darkfield Gemology
In a gemological microscope, darkfield illumination usually illuminates the gemstone from the side or below while preventing direct illumination from entering the objective.
Internal inclusions scatter the light.
They appear bright against a dark background.
This is especially useful for identifying:
- Inclusions
- Internal fractures
- Growth structures
- Treatment features
Brightfield Gemology
Brightfield illumination can provide a more directly transmitted view through transparent gemstones.
It can help reveal:
- Color zoning
- Transparency
- Certain internal structures
Gemological microscopes often combine several illumination modes rather than relying on only one.
MicroscopeX Gemological Systems
The VGM400 Gem Microscope provides:
- Brightfield
- Darkfield
- Top illumination
for gemstone inspection.
The VGM230 Gem Microscope similarly provides three illumination modes for observing both internal and surface characteristics.
This is an excellent example of brightfield and darkfield being complementary rather than competitive.
Brightfield vs Darkfield for Biological Specimens
Different biological samples respond differently.
Stained Tissue Sections
Recommended starting point:
Brightfield
Why?
Stains intentionally create absorption and color contrast.
Brightfield displays these colors naturally against a bright background.
This is ideal for:
- Histology
- Pathology teaching
- Plant sections
- Routine laboratory microscopy
Unstained Transparent Cells
Brightfield can show them, but contrast may be weak.
Darkfield can significantly increase edge visibility.
Other techniques may also be appropriate, including:
- Phase contrast
- DIC
For live transparent cells, these methods often provide more internal structural information than darkfield alone.
Small Aquatic Organisms
Darkfield can be very effective because:
- Background becomes black
- Transparent organism scatters light
- Outlines become bright
This produces visually striking images without staining.
Fibers and Hair
Darkfield is excellent for revealing:
- Fine edges
- Surface irregularities
- Thin transparent structures
Brightfield may remain useful for:
- Color
- Overall morphology
- Internal pigmentation
Again, both modes can be complementary.
Diatoms
Diatoms contain fine silica structures.
Brightfield can provide useful overall morphology.
Darkfield can strongly highlight:
- Edges
- Fine scattering structures
- Surface details
More advanced contrast techniques may provide additional information.
Particles and Contamination
Darkfield is especially effective for detecting:
- Dust
- Small particles
- Contamination
because even small scattering objects can appear brightly against the dark background.
This makes darkfield useful in:
- Industrial cleanliness inspection
- Materials analysis
- Surface quality control
Brightfield vs Darkfield for Bacteria
Brightfield can be useful when bacteria are:
- Stained
- Sufficiently concentrated
- Naturally contrasted
Darkfield can improve the visibility of unstained microorganisms by highlighting scattered light.
However, image interpretation and diagnostic applications require appropriate laboratory methods and should not be based on illumination mode alone.
For general research and teaching, technique selection should depend on specimen preparation and required information.
Brightfield vs Phase Contrast
Brightfield and darkfield are not the only options for transparent specimens.
Phase contrast is particularly useful for live, unstained biological cells.
Instead of blocking direct light, phase contrast converts phase differences caused by refractive-index variation into visible intensity differences.
It can reveal internal cellular details that may not be as obvious in darkfield.
When Phase Contrast May Be Better Than Darkfield
Choose phase contrast when you need:
- Internal cellular structure
- Live cell observation
- Transparent specimens
- More natural morphological information
Choose darkfield when you particularly want:
- Strong outlines
- Small particles
- Edges
- High-contrast scattering features
These methods answer different questions.
Brightfield vs DIC
Differential interference contrast, or DIC, can produce strong contrast and an apparent relief-like effect in transparent samples.
DIC is more complex and expensive than basic darkfield.
It can provide excellent structural visualization.
Darkfield remains attractive because of its:
- Simplicity
- Strong contrast
- Low preparation requirements
Brightfield vs Fluorescence
Fluorescence microscopy operates on a fundamentally different principle.
Fluorescent molecules absorb excitation light and emit light at longer wavelengths.
This allows highly specific structures to be labeled.
Brightfield and darkfield generally reveal specimen structure based on ordinary light interactions.
Fluorescence provides:
Molecular or labeling specificity
These methods can also be combined in advanced imaging workflows.
Advantages of Brightfield Microscopy
Brightfield offers several important strengths.
1. Simple Optical Setup
Most compound microscopes support brightfield by default.
2. Efficient Use of Light
Direct illumination enters the objective.
This produces a bright image with relatively modest illumination power.
3. Natural Color Reproduction
Brightfield is excellent for:
- Stained specimens
- Pigmented samples
- Colored materials
4. Easy Digital Imaging
The bright image works well with:
Explore Microscope Cameras for digital microscope imaging systems.
5. Familiar Image Appearance
Brightfield images are intuitive and widely used in:
- Publications
- Reports
- Education
- Routine microscopy
Limitations of Brightfield Microscopy
Brightfield also has weaknesses.
1. Low Contrast in Transparent Samples
Unstained cells may be difficult to see.
2. Staining May Be Required
Staining can:
- Take time
- Alter the specimen
- Prevent live observation
3. Fine Scattering Features Can Be Lost
Small particles or scratches may disappear against a bright background.
4. Excessive Aperture Adjustment Can Be Misleading
Closing the condenser aperture can increase contrast but may reduce resolution.
Correct illumination setup matters.
Advantages of Darkfield Microscopy
1. Exceptional Contrast
Bright structures against black produce strong visual separation.
2. Useful for Unstained Samples
Many transparent specimens can be observed without staining.
3. Excellent Particle Detection
Small scattering objects stand out clearly.
4. Excellent Edge and Surface Defect Visibility
Useful for:
- Scratches
- Grain boundaries
- Fibers
- Surface contamination
5. Visually Striking Images
Darkfield can produce attractive high-contrast microscopy images for teaching and documentation.
Limitations of Darkfield Microscopy
Darkfield also has important limitations.
Darkfield Limitation 1: Lower Light Efficiency
Most direct illumination does not enter the objective.
Only scattered or redirected light contributes strongly to the image.
This means darkfield often requires:
- Brighter illumination
- Longer exposure
- Higher camera sensitivity
Darkfield Limitation 2: Alignment Is More Critical
The condenser or illuminator must be properly centered.
Poor alignment can produce:
- Bright background
- Uneven illumination
- Hot spots
- Reduced contrast
Darkfield Limitation 3: Dust Becomes Very Visible
Dust and optical contamination scatter light.
They may appear as bright unwanted structures.
Darkfield therefore requires clean:
- Slides
- Coverslips
- Condenser
- Objective
- Optical surfaces
Darkfield Limitation 4: Image Geometry Can Be Less Intuitive
Darkfield emphasizes scattering and edges.
The image is not always a straightforward representation of specimen absorption or shape.
Bright structures may correspond strongly to:
- Boundaries
- Roughness
- Refractive changes
rather than uniform specimen material.
Darkfield Limitation 5: Internal Detail Can Be Less Clear
Darkfield is excellent for outlines and scattering features.
It may be less suitable than:
- Brightfield with staining
- Phase contrast
- DIC
for certain internal cellular structures.
Darkfield Limitation 6: High-NA Setup Can Be Difficult
As objective NA increases, achieving true darkfield becomes more demanding.
Specialized:
- Condensers
- Objectives
- Iris systems
may be required.
Brightfield vs Darkfield and Numerical Aperture
Numerical aperture remains important in both modes.
For brightfield:
Higher objective NA generally improves resolving capability.
For transmitted darkfield:
The illumination geometry must ensure that direct condenser rays remain outside the objective's accepted cone.
Therefore, darkfield compatibility depends on the relationship between:
Condenser NA
and:
Objective NA
Brightfield vs Darkfield and Resolution
Darkfield can make a structure easier to see, but microscope resolution remains governed primarily by:
- Numerical aperture
- Wavelength
- Optical quality
For more on this distinction, see:
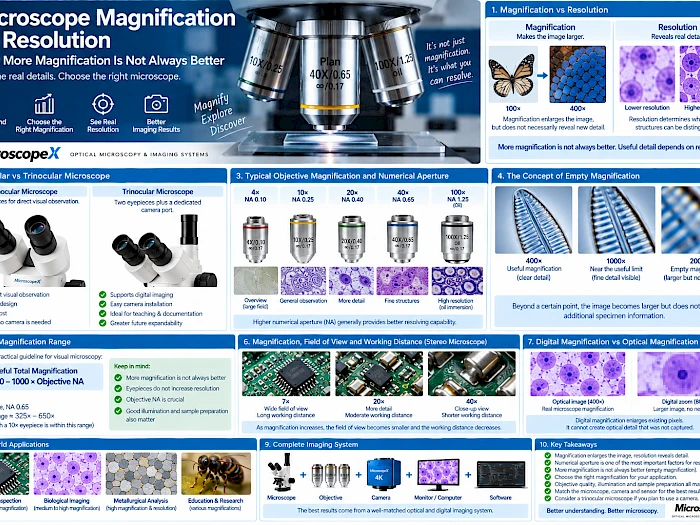
Microscope Magnification vs Resolution
Contrast and resolution work together, but they are not identical.
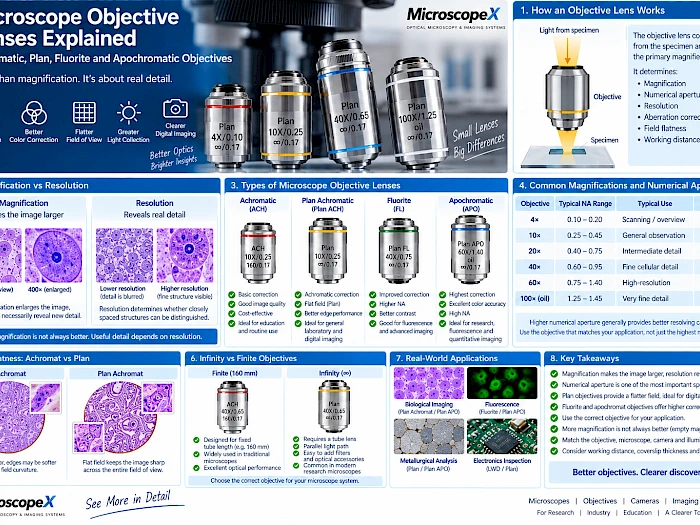
Brightfield vs Darkfield and Objectives
Standard brightfield microscopy can use common biological or metallurgical objectives.
Darkfield may require specialized optical compatibility.
For reflected industrial darkfield, BF/DF objectives are designed specifically to accommodate darkfield illumination.
See:
Infinity BF/DF Metallurgical Objectives
Brightfield vs Darkfield and Working Distance
Working distance is primarily determined by the objective rather than the illumination technique.
However, industrial BF/DF objectives may be available in long-working-distance designs.
This can be important when observing:
- Thick components
- Wafers
- Industrial samples
For more information, see:
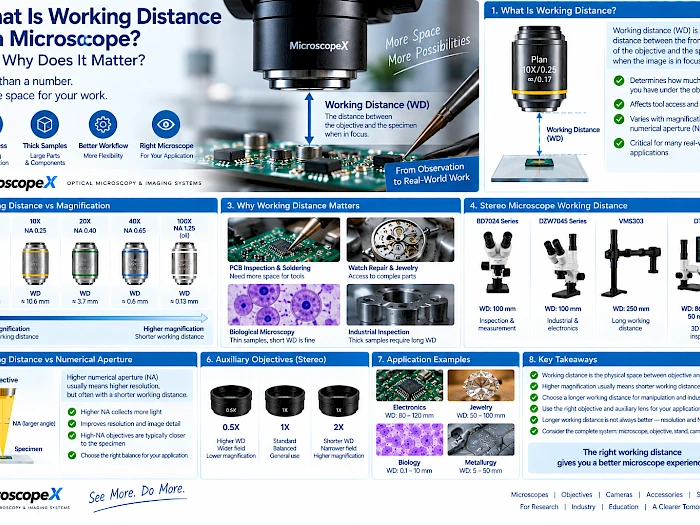
What Is Working Distance in a Microscope?
Brightfield vs Darkfield and Microscope Cameras
Both techniques can be captured digitally.
But the camera requirements can differ.
Camera for Brightfield
Brightfield generally provides abundant illumination.
Important camera characteristics include:
- Resolution
- Color reproduction
- Sensor size
- Software
For routine biological brightfield, a good color CMOS camera can provide excellent results.
Camera for Darkfield
Darkfield often delivers much less light to the sensor.
Useful camera characteristics include:
- Sensitivity
- Low noise
- Larger pixels where appropriate
- Good dynamic range
- Exposure control
For live darkfield imaging, illumination intensity and camera sensitivity become especially important.
Exposure Differences
Suppose the same specimen is imaged under brightfield and darkfield.
The brightfield image may require:
Short exposure
while darkfield may require:
Longer exposure or more illumination
because the camera receives only light redirected by specimen structures.
This is normal.
Avoid Excessive Gain in Darkfield
Increasing camera gain can brighten a darkfield image.
But excessive gain may also increase:
- Noise
- Background artifacts
A better approach is often to optimize:
- Illumination
- Condenser alignment
- Exposure
- Camera gain
in that order.
Dynamic Range in Darkfield
Darkfield images can contain:
- Very dark background
- Very bright scattering points
A camera with good dynamic range can help preserve both.
This is especially useful when some specimen structures scatter much more light than others.
4K Darkfield Imaging
A 4K camera can provide excellent digital darkfield images when the optical system supplies sufficient detail and illumination.
Benefits include:
- Large-screen display
- Documentation
- Cropping
- Fine surface inspection
But increasing pixel count cannot compensate for:
- Poor darkfield alignment
- Weak illumination
- Incorrect objectives
The optical configuration comes first.
How to Set Up Basic Transmitted Brightfield
A typical workflow is:
Step 1
Place the specimen on the stage.
Step 2
Select the lowest-power objective.
Step 3
Focus the specimen.
Step 4
Raise and focus the condenser where appropriate.
Step 5
Center the illumination.
Step 6
Adjust the aperture diaphragm.
For professional imaging, Köhler illumination is preferred where the microscope supports it.
How to Set Up Basic Transmitted Darkfield
The exact procedure depends on the microscope, but the general principle is:
Step 1
Start with a compatible low-NA objective.
Step 2
Install or select the darkfield stop / condenser.
Step 3
Focus the specimen.
Step 4
Center the condenser carefully.
Step 5
Adjust illumination until the background becomes uniformly dark.
Step 6
Fine-focus the specimen.
Specimen structures should appear bright against the dark background.
If the Darkfield Background Is Gray Instead of Black
Possible causes include:
- Condenser not centered
- Darkfield stop too small
- Objective NA too high
- Stray light
- Dirty optical surfaces
- Incorrect condenser height
Systematic adjustment usually solves the problem.
If You See a Bright Spot in the Center
The direct illumination may be entering the objective.
Check:
- Stop size
- Condenser centering
- Condenser height
- Objective compatibility
The direct central beam should normally be excluded from the objective in proper darkfield.
If Darkfield Is Too Dim
Possible solutions include:
- Increase illumination
- Increase exposure
- Use a more sensitive camera
- Check condenser alignment
- Clean optical surfaces
Do not immediately increase gain to maximum.
Correct optical setup usually provides better image quality.
Reflected Brightfield Setup
In a metallurgical microscope, light is directed down through the objective onto an opaque specimen.
Regular reflected light returns through the objective.
Flat reflective structures can therefore appear bright.
This makes brightfield excellent for:
- Overall surface morphology
- Coatings
- Pattern structures
- Material color
Reflected Darkfield Setup
Reflected darkfield sends high-angle illumination toward the specimen.
Regular reflected rays are excluded.
Surface defects redirect light into the objective.
The result is:
Dark surface + bright defects
This can reveal structures that are difficult to see in brightfield.
Brightfield vs Darkfield for Quality Control
Industrial QC frequently benefits from both modes.
Brightfield
Good for:
- Overall structure
- Dimensions
- Surface tone
- Pattern alignment
Darkfield
Good for:
- Scratches
- Particles
- Edge defects
- Contamination
A multi-mode microscope can switch between them during inspection.
Brightfield vs Darkfield for Precision Components
Examples include:
- Bearings
- Polished metal
- Electronic components
- Machined surfaces
Brightfield shows general surface condition.
Darkfield highlights structures that scatter light.
For defect detection, darkfield can often provide much higher visual contrast.
Brightfield vs Darkfield for PCB Inspection
For ordinary PCB solder inspection, reflected brightfield or general reflected illumination is usually sufficient.
It shows:
- Solder joints
- Traces
- Components
- Markings
Darkfield may be useful for specialized inspection of:
- Surface scratches
- Contamination
- Certain reflective defects
However, a general stereo microscope with adjustable directional lighting may be simpler for routine electronics repair.
Brightfield vs Darkfield for Gemstones
Gemology is one application where both methods are routinely valuable.
Darkfield
Best for:
- Inclusions
- Internal fractures
- Scattering features
Brightfield
Useful for:
- Transparency
- Color distribution
- Certain internal structures
Top Light
Useful for:
- Surface scratches
- Facet condition
- External damage
This is why dedicated gem microscopes often combine all three.
When Should You Choose Brightfield?
Choose brightfield when:
- The specimen is stained
- Natural contrast is already sufficient
- Accurate color reproduction matters
- You need a simple setup
- You want high illumination efficiency
- You are performing routine biological microscopy
- You need general metallurgical structure
- You want straightforward documentation
Brightfield should normally be the starting point for general microscopy.
When Should You Choose Darkfield?
Choose darkfield when:
- The specimen is transparent and low contrast
- You want to avoid staining
- Small particles need to stand out
- Edges are important
- Surface scratches need detection
- Contamination needs to be found
- Gemstone inclusions need inspection
- Brightfield is not providing sufficient contrast
Darkfield is especially valuable when the feature of interest interacts strongly with light through scattering rather than absorption.
When Should You Use Both?
Use both when different specimen features carry different information.
Examples include:
Metallurgy
Brightfield:
Overall surface.
Darkfield:
Scratches and particles.
Gemology
Brightfield:
Transparency and color.
Darkfield:
Inclusions.
Biological Specimen
Brightfield:
Overall morphology.
Darkfield:
Fine outlines and small scattering structures.
Switching between techniques can provide a more complete understanding of the specimen.
Choosing a Microscope for Brightfield and Darkfield
If both techniques matter, look for a microscope designed to support both.
Do not assume that any brightfield microscope can automatically perform high-quality darkfield.
Check:
- Condenser
- Objective compatibility
- Illumination system
- Objective NA
- BF/DF optical path
Biological Brightfield/Darkfield System
Typical components may include:
- Compound microscope
- Brightfield condenser
- Darkfield condenser or darkfield stop
- Compatible objectives
- Camera if required
At low to medium NA, darkfield conversion may be relatively straightforward.
Industrial BF/DF System
A dedicated industrial BF/DF microscope may include:
- Reflected illuminator
- BF/DF objective
- Specialized nosepiece
- Darkfield optical path
- Polarization
- Camera port
This is a much more specialized optical system.
Example: VM5000 Series
The VM5000 Series is designed for industrial inspection and measurement.
It supports:
- Brightfield
- Darkfield
- Polarized observation
- Digital imaging
This makes it suitable for precision parts and materials inspection where different surface features require different contrast methods.
Example: CM120BD-AF
The CM120BD-AF uses an infinity semi-apochromatic BF/DF optical system.
It supports:
- Brightfield
- Darkfield
- Polarization
- Optional DIC
for demanding materials inspection.
This type of platform demonstrates how advanced contrast methods can be integrated into one microscope.
Example: Gem Microscope
For gemstone applications, the VGM400 combines:
- Brightfield
- Darkfield
- Top light
with continuous stereo zoom.
This allows one specimen to be examined under several illumination conditions without changing microscopes.
Common Brightfield Mistakes
Mistake 1: Closing the Aperture Too Much
This may increase apparent contrast but reduce resolution.
Mistake 2: Using Too Much Illumination
Overexposure washes out contrast.
Mistake 3: Ignoring Condenser Alignment
Poor illumination alignment reduces image quality.
Mistake 4: Expecting Transparent Cells to Have Strong Natural Contrast
Consider:
- Staining
- Darkfield
- Phase contrast
- DIC
depending on the application.
Common Darkfield Mistakes
Mistake 1: Using an Objective with Too High an NA
Direct illumination may enter the objective and destroy the dark background.
Mistake 2: Poor Condenser Centering
Even small misalignment can reduce contrast.
Mistake 3: Dirty Slides
Dust becomes extremely bright under darkfield.
Mistake 4: Assuming Darkfield Gives More True Resolution
It primarily improves contrast and detectability.
Mistake 5: Expecting Darkfield to Show Every Internal Detail
Darkfield strongly emphasizes scattering structures and boundaries.
Other methods may be better for internal morphology.
Mistake 6: Using Insufficient Illumination
Darkfield is relatively light-inefficient.
Mistake 7: Buying BF/DF Objectives Without Checking Microscope Compatibility
Industrial BF/DF optics are system-specific.
Brightfield vs Darkfield Selection Table
| Specimen / Application | Brightfield | Darkfield | Suggested Starting Mode |
|---|---|---|---|
| Stained tissue | Excellent | Possible | Brightfield |
| Unstained transparent specimen | Low contrast | Excellent | Darkfield / phase |
| Live cells | Limited | Good | Darkfield / phase |
| Fibers | Good | Excellent | Darkfield |
| Small particles | Moderate | Excellent | Darkfield |
| Polished metal | Excellent | Excellent | Both |
| Surface scratches | Good | Excellent | Darkfield |
| Semiconductor contamination | Good | Excellent | Darkfield |
| Gemstone inclusions | Good | Excellent | Darkfield |
| Gemstone color | Excellent | Good | Brightfield |
| Routine education | Excellent | Useful option | Brightfield |
| General documentation | Excellent | Excellent for special features | Depends |
A Practical Selection Workflow
Step 1 — Is the Specimen Transparent?
If yes, continue.
Step 2 — Does It Have Strong Natural or Stained Contrast?
If yes:
Start with brightfield.
If no:
Consider:
Darkfield / phase contrast / DIC
Step 3 — Are You Looking for Tiny Particles or Edges?
If yes:
Try darkfield.
Step 4 — Is the Specimen Opaque and Reflective?
Use reflected-light microscopy.
Step 5 — Are Surface Defects the Main Target?
Consider:
Reflected darkfield.
Step 6 — Is Overall Surface Structure the Main Target?
Start with:
Reflected brightfield.
Step 7 — Do You Need Multiple Types of Information?
Choose a microscope capable of switching between modes.
Frequently Asked Questions
What is the main difference between brightfield and darkfield microscopy?
Brightfield allows direct illumination to enter the objective, producing a bright background.
Darkfield excludes most direct light so that only light scattered or redirected by the specimen enters the objective, producing a bright specimen on a dark background.
Is darkfield better than brightfield?
Not universally.
Brightfield is better for many stained and naturally contrasted specimens.
Darkfield is better for transparent low-contrast samples, particles, edges and certain surface defects.
Does darkfield require staining?
Usually not.
One of darkfield's major advantages is that transparent structures can often be visualized without staining.
Does brightfield require staining?
No.
However, many transparent biological specimens benefit greatly from staining because it increases absorption contrast.
Does darkfield improve resolution?
Darkfield primarily improves contrast and detectability.
It can make very small structures visible, but it does not simply increase the objective's fundamental diffraction-limited resolution.
Why is the darkfield background black?
The direct illuminating rays are arranged so they miss the objective.
Only light redirected by the specimen enters the objective.
With no specimen-scattered light, the background remains dark.
Why is darkfield dimmer than brightfield?
Because most direct illumination is deliberately excluded from the objective.
Only a relatively small amount of scattered light forms the image.
Why does dust look so bright in darkfield?
Dust strongly scatters light.
Because the background is dark, even small dust particles can become highly visible.
What specimens are best for darkfield?
Good candidates include:
- Unstained transparent specimens
- Fine fibers
- Small particles
- Diatoms
- Surface scratches
- Metallurgical defects
- Gemstone inclusions
What specimens are best for brightfield?
Brightfield is particularly useful for:
- Stained tissue sections
- Pigmented specimens
- Routine biological slides
- General metallurgical surfaces
- Colored materials
Can the same microscope do brightfield and darkfield?
Often yes, if the microscope is designed with a suitable darkfield condenser, stop or BF/DF reflected-light system.
Compatibility depends on the objectives and illumination system.
Do I need a special objective for darkfield?
For basic low-power transmitted darkfield, standard objectives may work.
For high-NA or reflected industrial darkfield, specialized objectives or adjustable-NA objectives may be required.
What is a BF/DF objective?
BF/DF means:
Brightfield / Darkfield
The objective is designed for a microscope optical system that supports both reflected brightfield and reflected darkfield illumination.
Is darkfield useful for metal inspection?
Yes.
Reflected darkfield is particularly effective for highlighting:
- Scratches
- Particles
- Grain boundaries
- Surface defects
against a dark background.
Is darkfield useful for gemstones?
Yes.
Darkfield is one of the most important gemological illumination methods for revealing internal inclusions and other light-scattering features.
Is darkfield useful for PCB repair?
Routine PCB repair usually relies on general reflected illumination.
Darkfield can be useful for specialized surface-defect or contamination inspection, but is not necessary for most soldering work.
Which camera is better for darkfield?
Look for good:
- Sensitivity
- Low noise
- Dynamic range
- Exposure control
because darkfield generally provides less image light than brightfield.
Conclusion
Brightfield and darkfield microscopy use fundamentally different illumination strategies.
Brightfield microscopy sends direct illumination into the objective.
It provides:
- Bright background
- Natural color
- Efficient illumination
- Excellent imaging of stained and naturally contrasted specimens
Darkfield microscopy excludes most direct illumination and records light redirected by the specimen.
It provides:
- Dark background
- Strong edge contrast
- Excellent particle visibility
- Excellent detection of scratches and scattering features
- Strong visualization of transparent unstained specimens
The key distinction is not simply:
bright vs dark background
but:
Direct light vs specimen-scattered light
For routine biological microscopy, brightfield is usually the natural starting point.
For transparent low-contrast specimens, darkfield can reveal structures that are difficult to see otherwise.
For industrial materials, brightfield and darkfield are often complementary:
Brightfield shows the overall surface.
Darkfield makes scattering defects stand out.
For gemology:
Brightfield helps evaluate transmitted structure and color.
Darkfield highlights inclusions.
The most versatile microscopy systems therefore do not force you to choose one technique forever.
They allow you to choose the illumination method that best reveals the information you need.
Explore Brightfield and Darkfield Microscope Systems
Metallurgical & Industrial Microscopes
- Compound Microscopes
- VM5000 Brightfield / Darkfield Metallurgical Microscope
- CM120BD-AF BF/DF Metallurgical Microscope
- CM80BD-AF BF/DF Metallurgical Microscope
BF/DF Objective Lenses
Gemological Microscopy
Digital Imaging
Learning Resources
- Optical Microscope Basics
- Microscope Magnification vs Resolution
- Microscope Objective Lenses Explained
- What Is Working Distance in a Microscope?
Need help choosing brightfield, darkfield, BF/DF objectives or a complete digital microscope system?
Contact MicroscopeX for complete optical microscopy and imaging-system configuration support.